Monday, October 1, 2012
Hearts
Thanks to Crazy Mom's clear instructions, I have learnt to do stacked dimple rings, a manoeuvre not as simple as it might appear! After making the orange bookmark, I thought I'd add beads to make a bracelet. I started with size 20 thread, but aside from my problem with the last stitch unflipping, the beads were too big for the thread. I had to either use smaller beads or thicker thread. The heart-shaped beads seemed so perfect for the project that I decided to go with the thicker thread. The thread is Milford satin 3-ply, about the thickness of size 10 thread. This is #3 for my challenge. Thanks Crazy Mom.
Saturday, September 29, 2012
Stacked Dimple Rings
We went to Hartswater on Thursday. Jack's dentist appointment was a failure, but I was happy that I bought some organza for food covers from a very friendly shopkeeper.
Pretty colours, aren't they? The organza is 150 cm wide, so I bought 150 cm of each colour, which I will cut into quarters. I did once make a food cover that was 150 cm square, but that was a little excessive.
Friday, September 28, 2012
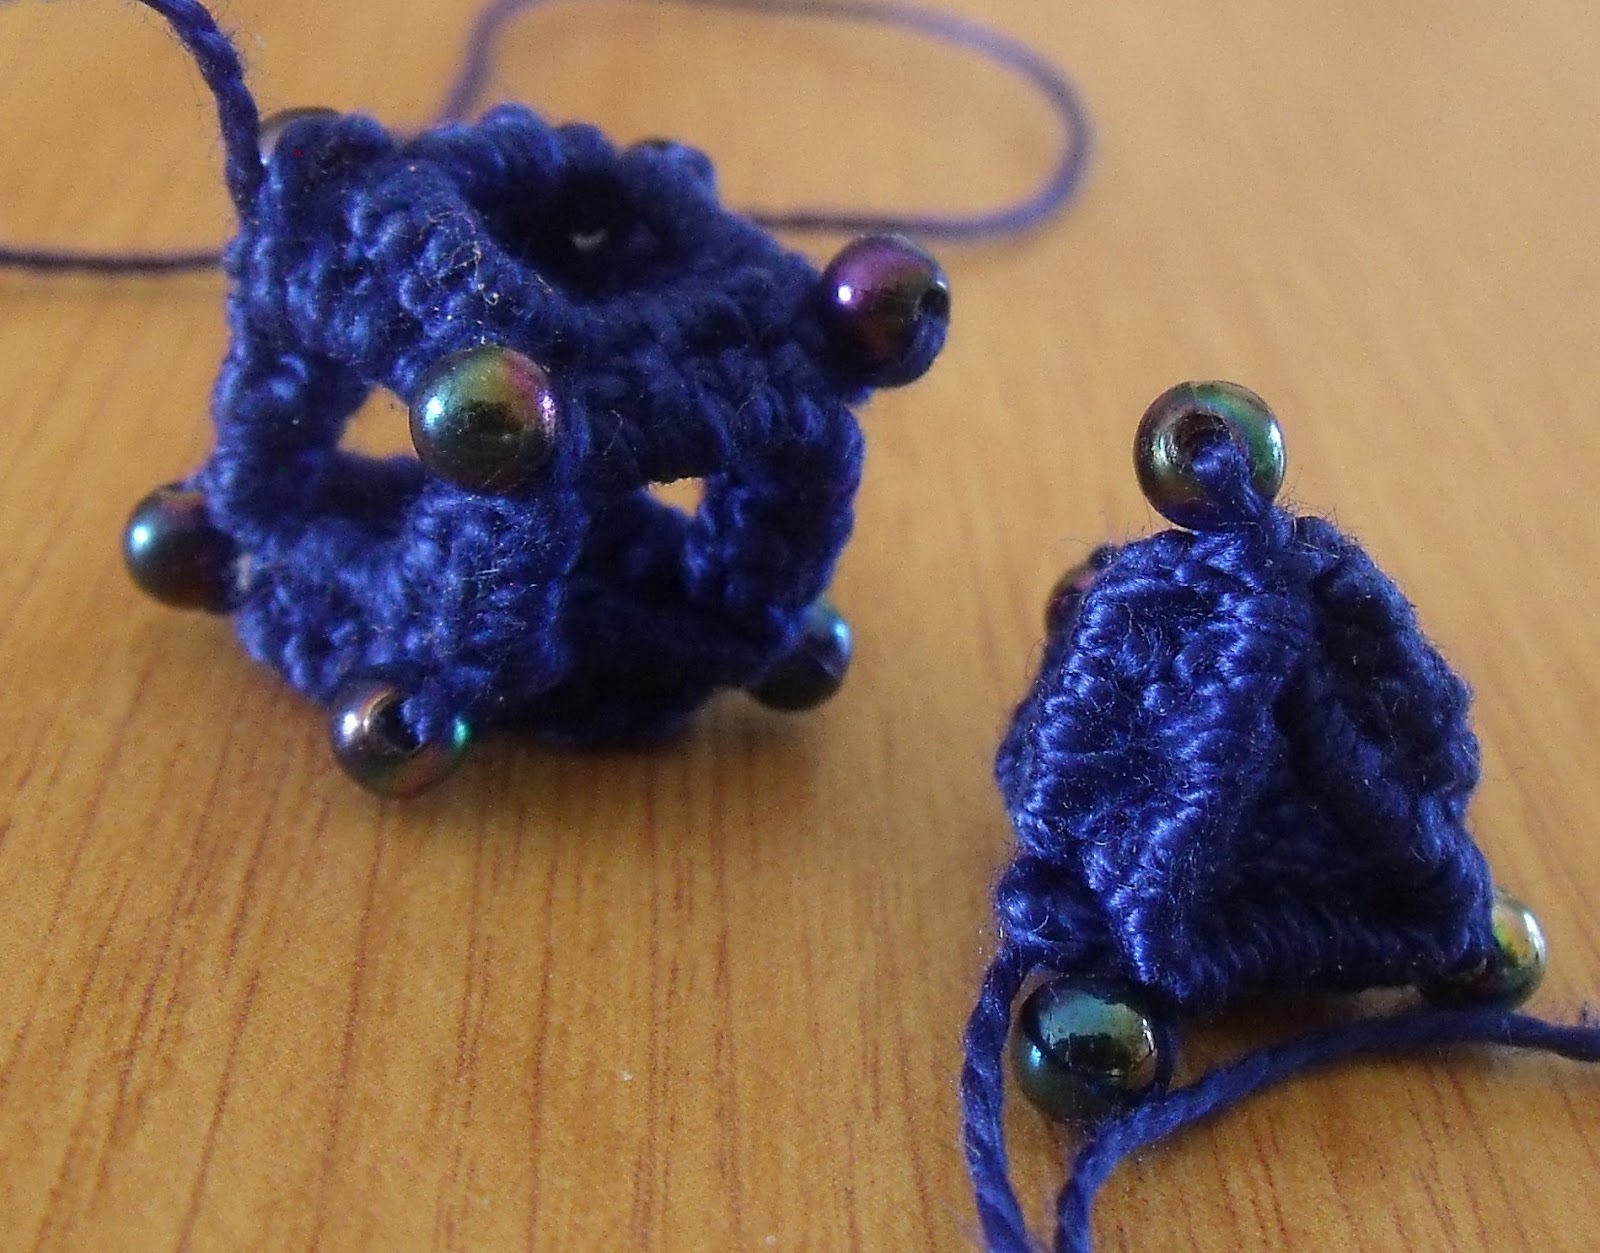
Cube Earrings
More funky than elegant. I realised when I was tatting the tetrahedron that I was making things unnecessarily difficult for myself in the way I was constructing the cube. It's possible to join on the finger tatted section of the SSSR, but it's fiddly and not strictly necessary for the cube. So here's how I did the cube for the earrings (This is not a substitute for Andres Mancenido's excellent tutorial, it's an extra guideline to the cube specifically)
R1: 4 beads on back of hand, shuttle tatted *Bead 1-2-2-1, repeat 4 times
R2: 2 beads on hand, side 1 joined to R1, Side 2, shuttle tat, bead in position, side 3 finger tat, bead in position, side 4 finger tat
R3: 1 bead on hand, side 1 joined to R2, side 2 joined to R1, side 3 shuttle tat, bead in position, side 4 finger tat
R4: as for Ring 3, joining to appropriate edges
R5: Side 1, shuttle tat, sides 2 -4 shuttle tat, joining as you go.
R6, shuttle only, joining all sides.
Ok, enough of this now. This is my # 2 for the challenge.
R1: 4 beads on back of hand, shuttle tatted *Bead 1-2-2-1, repeat 4 times
R2: 2 beads on hand, side 1 joined to R1, Side 2, shuttle tat, bead in position, side 3 finger tat, bead in position, side 4 finger tat
R3: 1 bead on hand, side 1 joined to R2, side 2 joined to R1, side 3 shuttle tat, bead in position, side 4 finger tat
R4: as for Ring 3, joining to appropriate edges
R5: Side 1, shuttle tat, sides 2 -4 shuttle tat, joining as you go.
R6, shuttle only, joining all sides.
Ok, enough of this now. This is my # 2 for the challenge.
Aha, a Cube
Albeit a rather wobbly one. And a tetrahedron, also rather wobbly. It's quite difficult to get the tension the same on all the faces. The first ring tends to be bigger and looser than the ones that have joins and are looped around beads. I guess it's a matter of practice. See yesterday's post for a link to the tutorial I used to make these. I'm not sure how many practical applications they have, but I'm thinking of making cube earrings.
Wednesday, September 26, 2012
The Third Face
Thanks to LadyTats, I can give you a link to the tutorial I'm using to tat a cube. Faces one and two were relatively straightforward. But for the third face, you need to finger tat the fourth edge, as a Single shuttle split ring, to make sure that the thread is in the right place for the next face. Hmmm. I struggled with that. I gave it some thought as we drove to town and managed it when I got home again. The neat thing is that when you close the SSSR, you use the bead as an anchor to prevent it from disintegrating. Clever. Face four is the same as face three, so that was no problem. But face five requires finger tatting on two edges. My first attempt is a mess. I hope I can remove it without damaging the first four rings. I was making very slow progress when I kept starting from scratch each time I made a mistake!
Tuesday, September 25, 2012
Joining the Challenge
I've joined the 25 motif challenge. What I want to do, is to challenge myself to try different techniques that I either haven't used before, or have struggled with. Like the layered tatting I used yesterday. So I count the earrings as my #1 for the challenge.
Months ago I downloaded a PDF called Single-threaded Tatted Platonic Solids Tutorial. Phew. Daunting name. It's a tutorial by Andres Mancenido showing how to create 3-dimensional geometric shapes - cubes, pyramids etc. I don't know where I downloaded it from, and I can't create a link, but In-Tatters is mentioned as a contact, so anyone interested may be able to find it there. The tutorial shows the principles for creating any such platonic solid. The tutorial is clear, but it might have been easier for a beginner if it showed specific directions for one solid to start with. I'm working on it, but I realise that I need to get my head around getting the planes right in relation to each other. This first attempt will have to be abandoned - it's not going to turn into a cube with a bead at each corner - but I have learnt a lot in the process.
Layered flower earrings
I used the same pattern as yesterday, Jennifer Williams's Flower using two layered tatting, only I used beads instead of making picots on the big rings and added beads when joining the picots on the small rings. I also used size 40 thread instead of 20, to make them a reasonable size for an earring. Each one is about 3cm across.
Subscribe to:
Posts (Atom)