
Saturday, September 29, 2018
Butterflies Tethered
Thursday, September 27, 2018
Playing With Butterflies

By the way, I wind thread left over on shuttles onto bread bag ties to use for such experiments:


Tuesday, September 25, 2018
Spiralling


Monday, September 24, 2018
Spring Flowers


Friday, September 21, 2018
Knitting Thimble


Thursday, September 20, 2018
Working Downwards
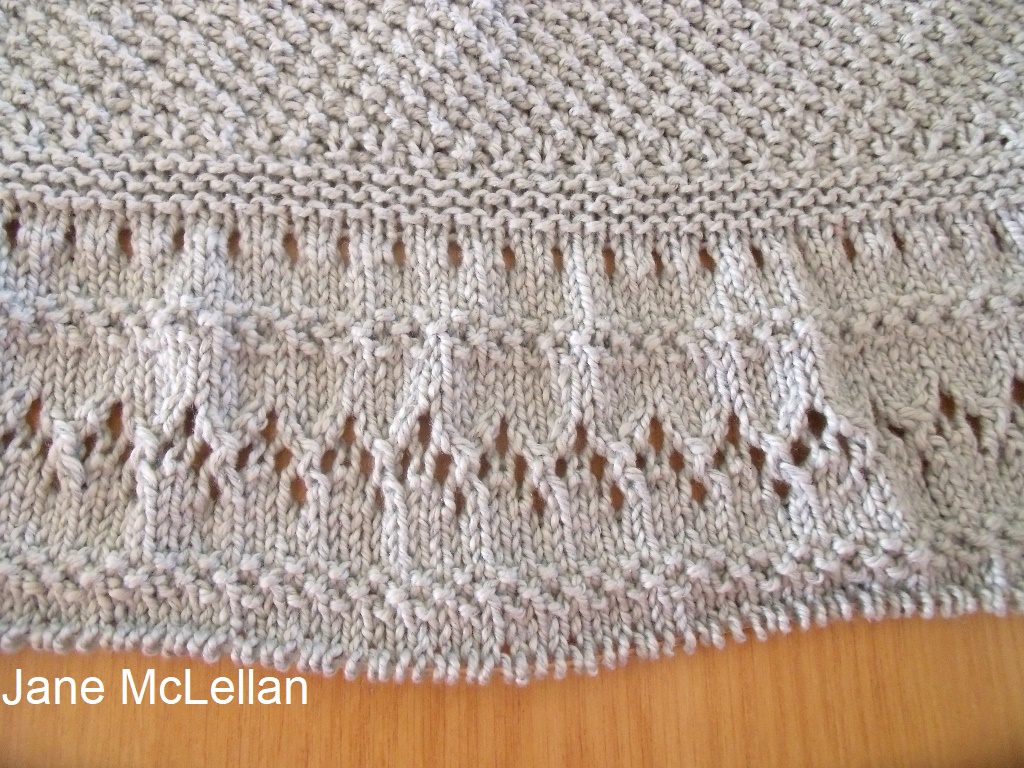
I'm working downwards on the back of my gilet, the patterns matching the patterns on the front. There are a lot of stitches, 215 at the moment, which is why the pattern recommends using a circular needle, even though it is worked back and forth.
Tuesday, September 18, 2018
Structuring The Back


Saturday, September 15, 2018
Braided


Wednesday, September 12, 2018
Leaf Braid With Flowers
I'm tatting a leaf braid with flowers to go around the neck of my polka dot dress, so I took some photos to show the process.


Leaf
Braid With Flowers ©Jane
McLellan 2018
Using
a split self-closing mock ring, which I learnt from muskaan's post
https://tipsaroundthehome.blogspot.com/2018/08/the-correct-guess.html
where she explores
Randy Houtz's technique.

Materials
3
shuttles, 2 wound CTM with green thread, size 20 and shuttle 3 with
white thread. Note, I used size 70 for this, but size 20 can be used,
as shown below.

Abbreviations
ds
double stitch, CTM continuous thread method, jk josephine knot, SCMR
self closing mock ring
Foundation
Using
any method for starting with a chain, work 3 ds using the shuttles
wound with green thread. Then wrap the white thread around a green
thread and work a josephine knot, of 12 second half stitches, hiding
the end inside the jk.

First
split SCMR
Using
shuttle with white thread as working shuttle, wrap thread around
pinky and work 2 ds, picot, 6 ds chain with green thread:

Then
remove the loop of white thread from pinky and put it on forefinger.
Using the other green thread, work 4 ds in direct tatting, as per the
second half of a split ring:


Now
pass the white thread shuttle through the loop and pull to close the
ring:


Work
another jk with white thread.
Second
split SCMR
Work
in the same way, but work 4 ds on first half and 2 ds picot 6 ds on
second half.

Work
these 2 split rings alternately, with jk in between.
Note,
instead of working a jk for 'flowers' you can make a ring with
picots:

The original leaf braid, without flowers, is shown here. The stitch count for this one is the same, just adding the third shuttle and split SCMR technique. I've made a PDF, there's a link on the right hand side of the page.
Tuesday, September 11, 2018
Polka Dots

Monday, September 10, 2018
Gilet Front Is Done


Friday, September 7, 2018
More Shopping

When I was in the local fabric shop recently, I saw some polka dot material. Afterwards it occurred to me that it would be good for a Summer dress. Summer is hesitating - we had frost this morning - but it must arrive soon. So yesterday I went back and bought fabric, plus lining. I plan to make a put-on-and-go dress, no zips or buttons. Watch this space.
Wednesday, September 5, 2018
Feedback

I also showed my practice glasses case to Corlie, our resident expert. Corlie likes what I've done, but says there needs to be more embroidery. She suggested adding a frame around the motif. That's fine, that's something I can work on.
Monday, September 3, 2018
Gilet - First Steps


It soon became clear that the swatch with 4 mm needles was going to be too big, so I didn't complete the swatch. I knitted one with 3 mm needles. It was too dense and not quite big enough. I don't have 3.5 mm needles, but I had a look through my circular needles and found 3.75 mm. That swatch has the right width but measures 9 cm long where it should be 10 cm. Hmmm. I looked at the pattern carefully and decided I can add some extra rows of stocking stitch to make up the difference. I'm starting with the Right Front, because I think it'll be easier to match the the back to the fronts than vice versa. So far, so good, I've just got to remember to write down where I put the extra rows in, so that I can match it on the Left Front.
Saturday, September 1, 2018
Doing the Split
When I saw muskaan's post showing her exploration of Randy Houtz's Split Self Closing Mock Ring, I had to try it. I fiddled:
 It's not very difficult and has a lot of possibilities. One thing I'd like to use it for is to do a version of the leaf braid with flowers:
 I think I like the josephine knot best, but the little picot flower would also work. 'Onion ring' braid? My first attempt is scruffy, but it shows the possibilities:
 Muskaan created a really spectacular bracelet using a modified version of the technique. So there's more than one way of doing the split.


Subscribe to:
Posts (Atom)